EOS BEGINNERS: Anatomy of an EOS Account

This a best practices guide for beginners that are thinking of setting up an EOS account. It is also a guide for those that currently own an EOS account and wish to learn more about it.
Please note, this guide is aimed at those that wish to protect their own EOS assets, and therefore, these tips are not applicable to those that hold their EOS on an exchange. By definition, if your EOS is held on an exchange you do not own any EOS, you only have an IOU from an exchange and are vulnerable to fees, overarching regulations, and hacks. For a guide on how to move your EOS off an exchange and into a secure wallet, please read this article by EOS New York.
If you are a super beginner, we suggest EOS Canada’s excellent dictionary of EOS terms ABCs of EOS. After reading the terms in this dictionary, you will have the lexicon needed to understand many of the terms used in this article.
If you would like to learn about best practices for securing your account, please read our article “EOS BEGINNERS: Account Security Best Practices”.
This article will cover the following topics. Please navigate with regard to your experience level and need.
WHAT IS AN EOS ACCOUNT?
WHAT IS ANCHOR?
HOW TO CREATE AN EOS KEY PAIR
HOW TO CREATE AN EOS ACCOUNT FOR FREE
IMPORTING A PRIVATE KEY TO ANCHOR
WHAT ARE ACTIVE AND OWNER KEYS?
TYPES OF WALLETS
WHAT ARE RAM, CPU AND NET?
WHAT DO “STAKE” AND “UNSTAKE” MEAN?
HOW TO STAKE AND USE REX
1. WHAT IS AN EOS ACCOUNT?
An EOS account is a readable name that is stored on the EOS blockchain and connected to your “keys”. An EOS account is required for performing actions on the EOS platform, such as sending/receiving tokens, voting, and staking.
Each account is linked to a public key, and this public key is in turn linked to a private key. A private key can be used to generate an associated public key, but not vice versa. (A private key and its associated public key make up a key pair.)
These keys ensure that only you can access and perform actions with your account. Your public key is visible by everyone using the network. Your private key, however, will never be shown. You must store your private keys in a safe location as they should not be shared with anyone (unless you want your EOS to be stolen)!
TLDR: EOS Accounts are controlled by key pairs and store EOS tokens in the Blockchain. Wallets store key pairs that are used to sign transactions.
Source: https://www.eosx.io/guides
2. WHAT IS ANCHOR?
Anchor is a tool developed by Greymass that allows users to connect and interact with the EOS blockchain (and other blockchains too). It is important to know what Anchor is and understand how to use it as it will be a touchstone tool in this article going forward.
Once you set up Anchor, you will be able to sign transactions, protect your data, and interactive with apps, all without exposing your EOS keys.
You can download the latest version of Anchor here for Windows, macOS, Linux and iOS. Follow the download and set up instructions and come back to this article.
3. HOW TO CREATE AN EOS KEY PAIR
3.1 Create an EOS Key Pair on Anchor
To create an EOS Account you need a key pair which consists of a private key and a public key. If you already have a key pair, please skip this section and navigate to HOW TO CREATE AN EOS ACCOUNT.
There are many ways to create a key pair, but we recommend Anchor Wallet OR the Ledger Nano S.
Anchor is one of the most used EOS wallets. It allows users to sign transactions to both web and desktop applications without ever exposing your keys or filling out forms. Everything in your Anchor is stored locally on your device.
If you want to generate your key pair through Anchor:
- Download and Install Anchor Desktop from: https://greymass.com/en/anchor
- Click "Set up New Wallet" and select the chains you want to interact with.
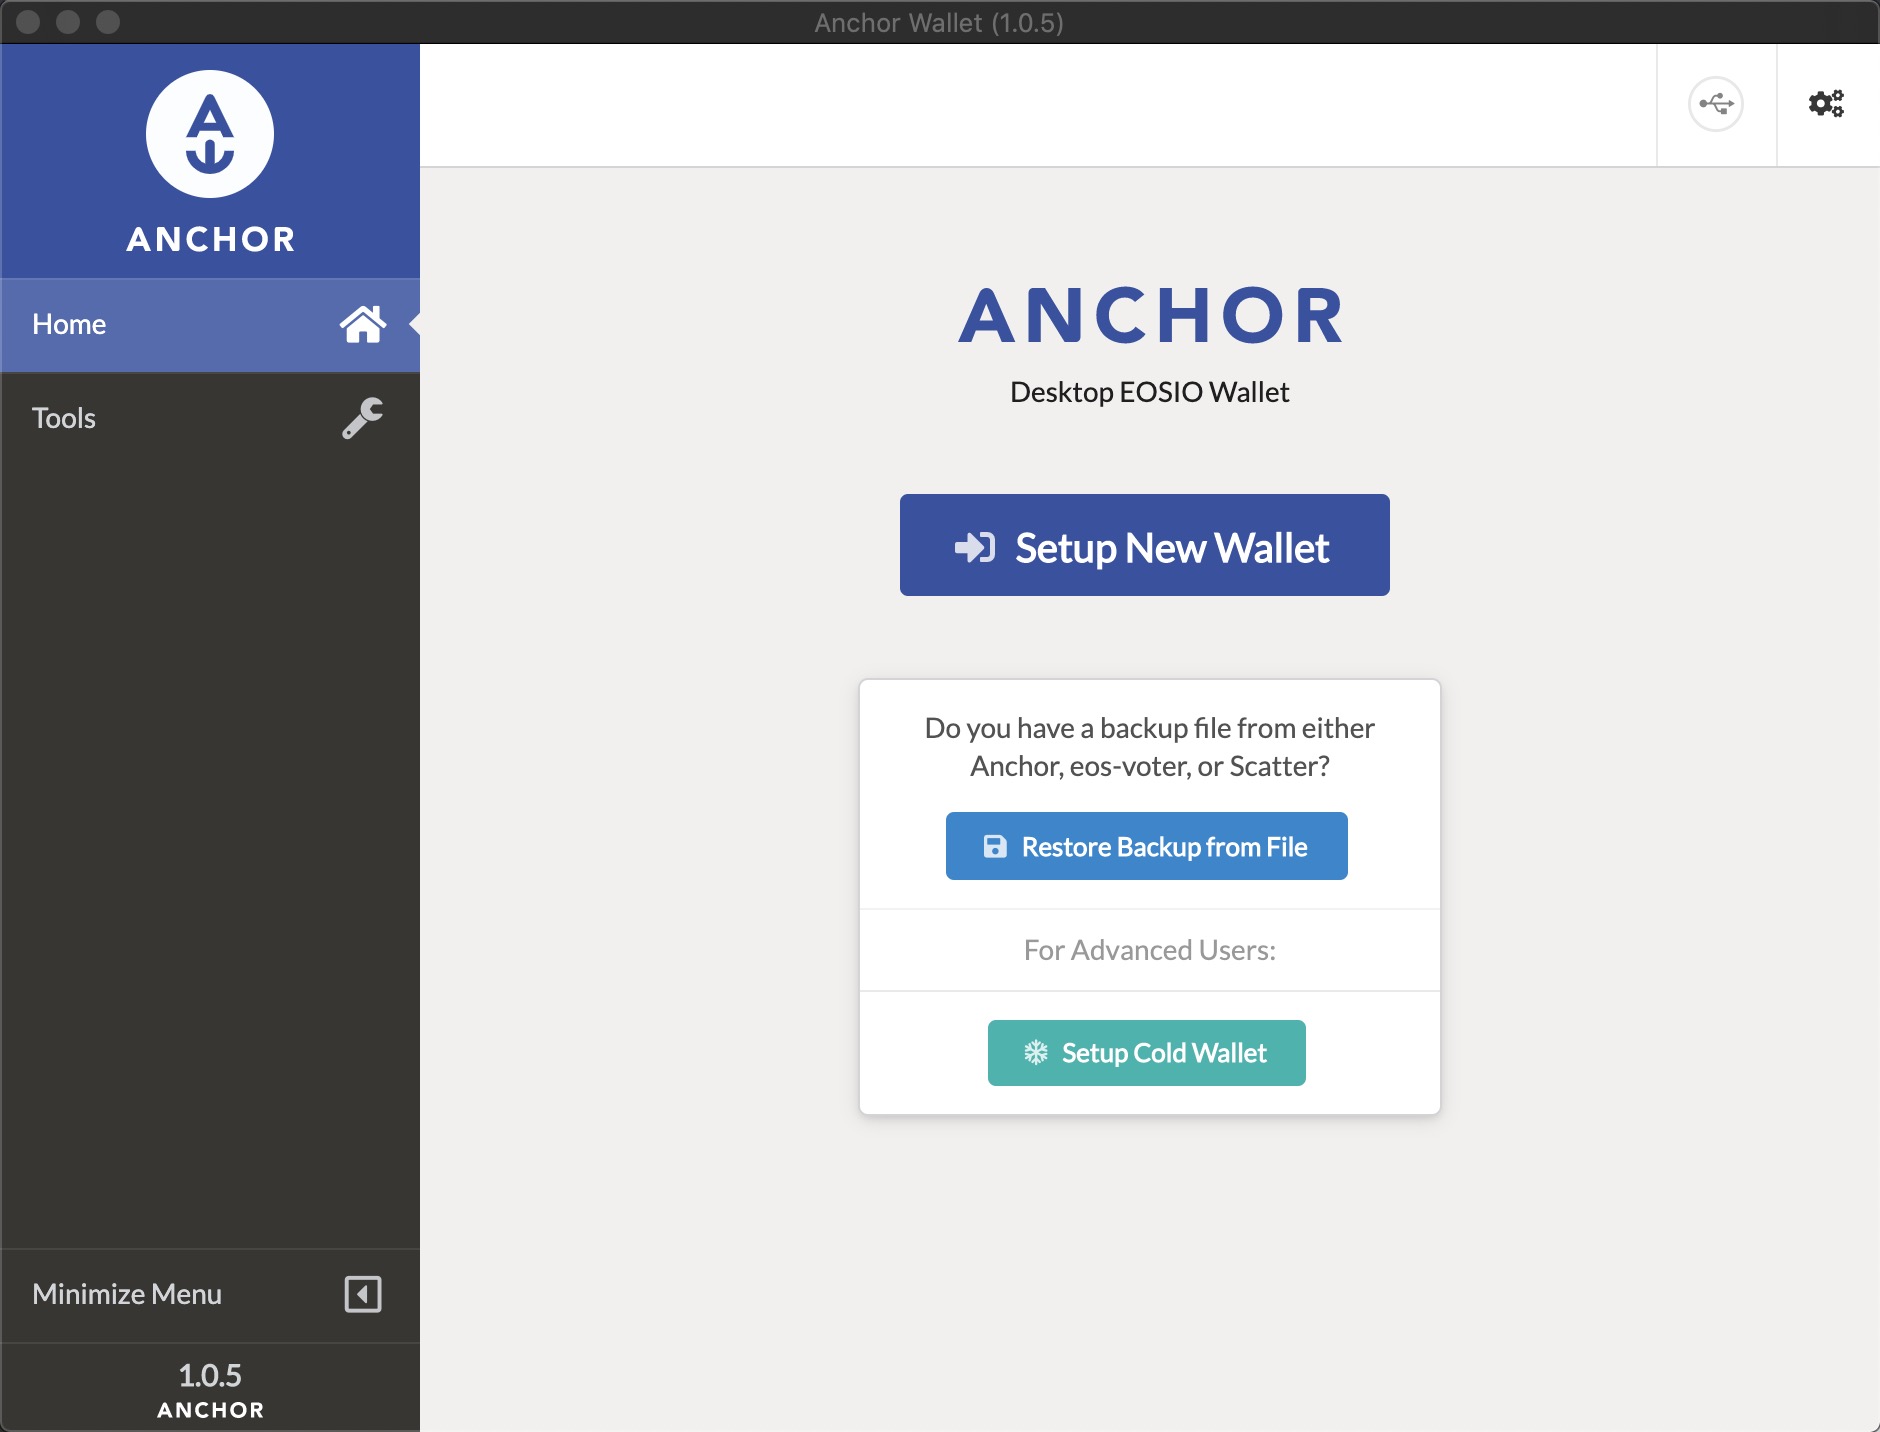
- Here we will select the EOS mainnet. Remember that the blockchains that are enabled can be changed at any point in the future. Finally click "Enable blockchains"
- Now to create our key pair we need to click on "Tools", and then "Manage Keys " under the Security section.
- In the Key Management are we can finally create our first key pair by clicking on "Generate Key Pairs"
- Before generating the key pair we need to setup a password for use within your Anchor wallet.
- Now click on "Generate Key Pair" and Anchor will now generate a new key pair which has not been yet saved anywhere
- To not lose your new key pair,be sure to click on "Save Keys to Wallet"
- Now you finally have your new keys that you will need to manage your EOSIO accounts. Keep them safe!
3.2 Import your Key Pair from the Ledger Nano
If you want to generate your key pair using the Ledger Nano:
- Install the latest firmware.
- Download and Install the Ledger Live app.
- Open Ledger Live and install the EOS application.
The Ledger Nano S comes with a private key already stored on the device, so you don’t need to generate a key pair. Instead, you need to attach the key pair from Ledger to Anchor without ever exposing the private key.
Follow these instructions:
- Download and Install Anchor Desktop from: https://greymass.com/en/anchor
- Click "Set up New Wallet" and select the chains you want to interact with.
- Here we will select the EOS mainnet. Remember that the blockchains that are enabled can be changed at any point in the future. Finally click "Enable blockchains"
- Now click on "Import Account" and "Enable Ledger Support"
- Be sure to have your Ledger Nano connected and unlocked, then wait for a pop-up to open on your Anchor app.
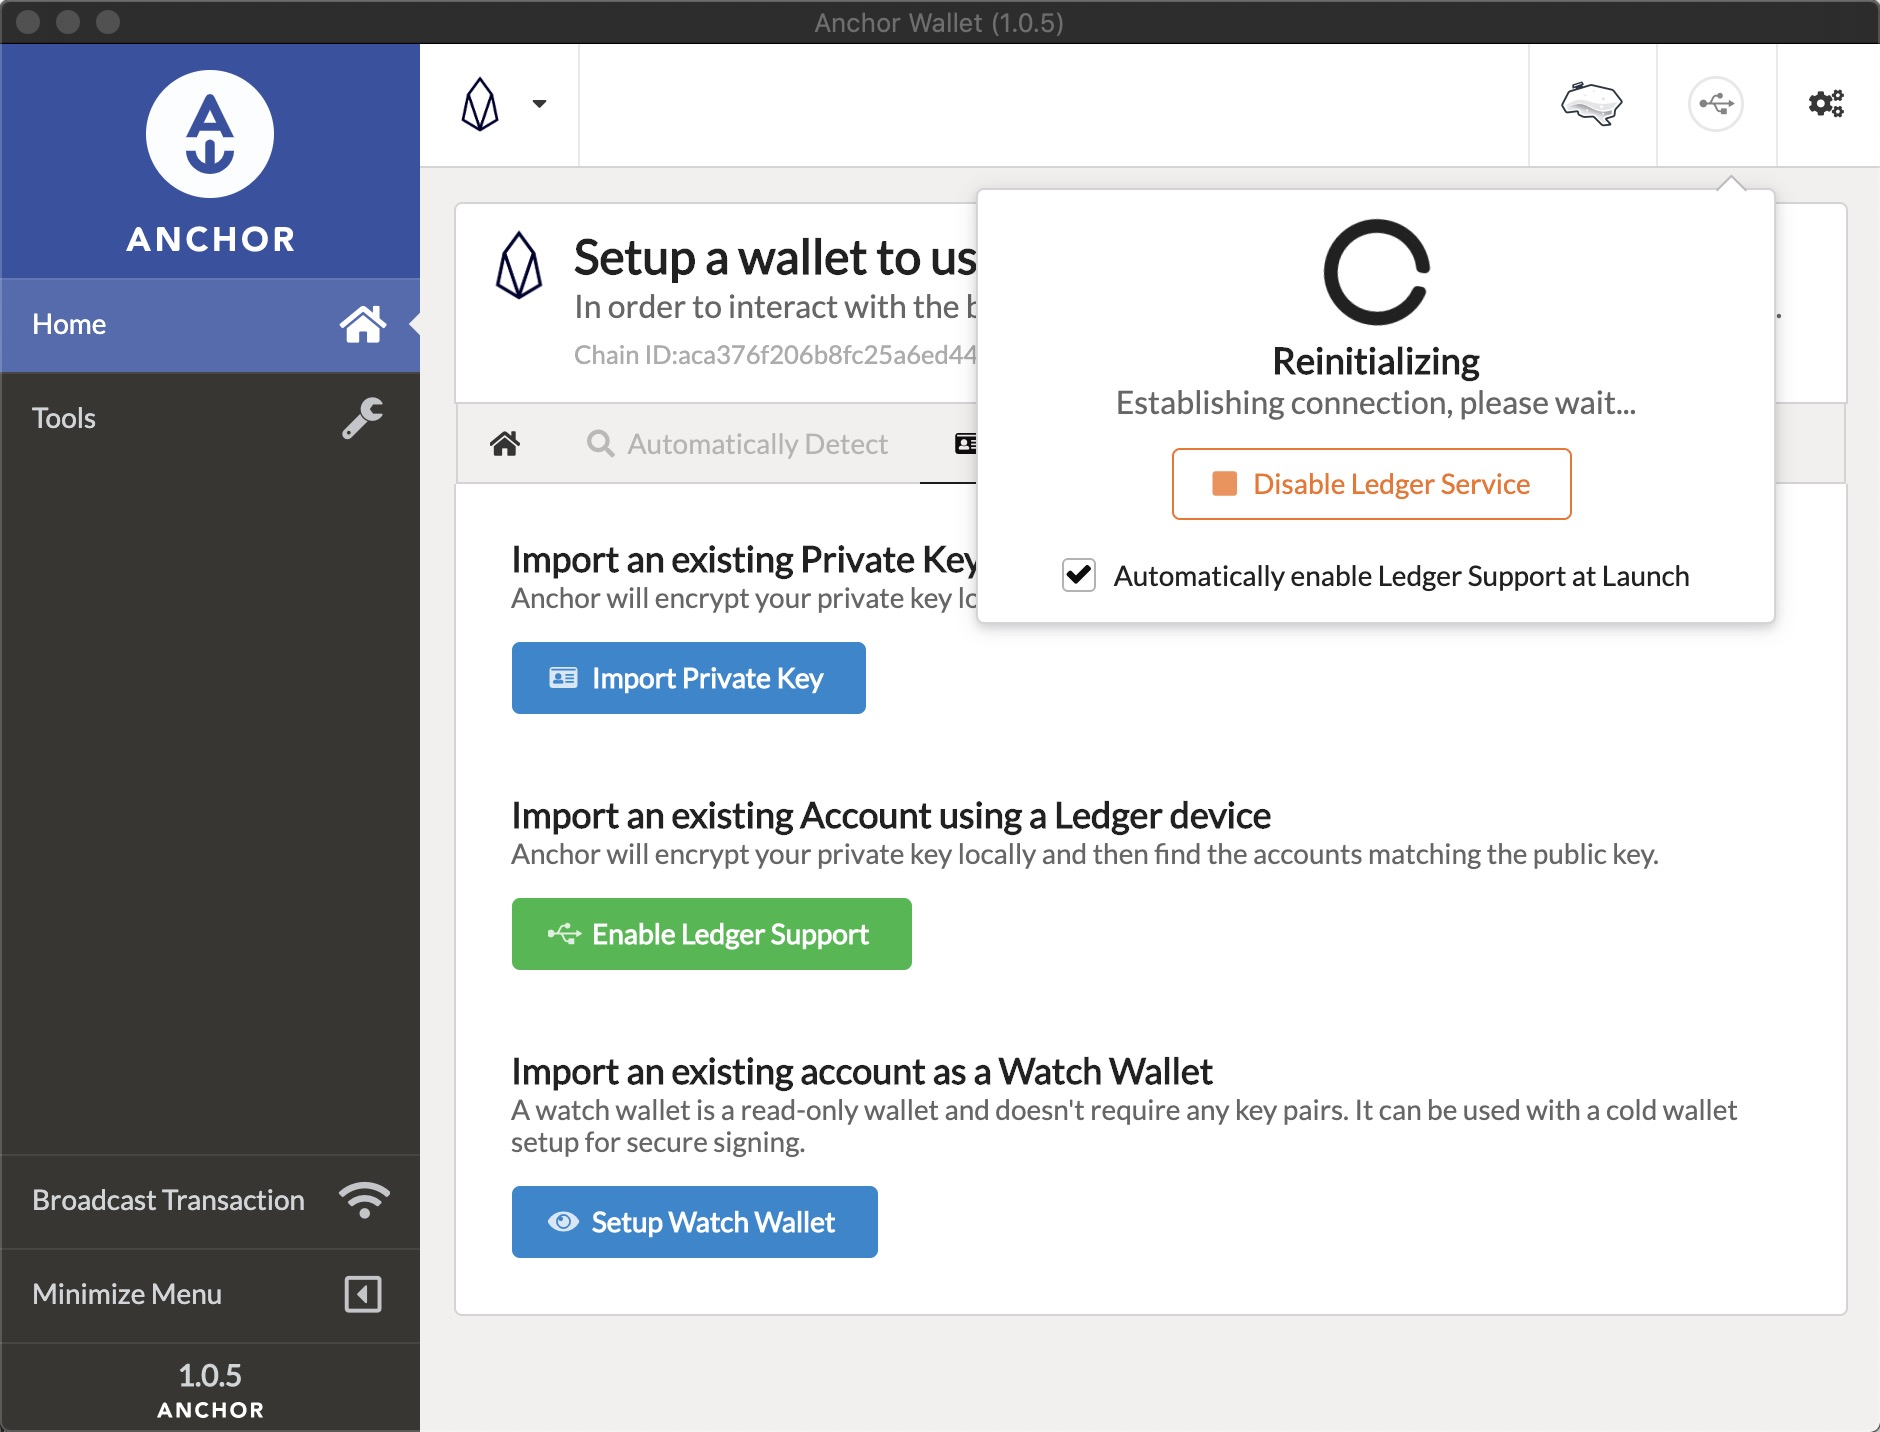
- Navigate to the EOS application on you Ledger and wait for Anchor to complete the Reinitializing process.
- After the Ledger has been successfully connected, you can click on the "Load from Ledger" option, and select the key pair to import
3.3 How to Create and EOS Account for Free
For a complete guide on how to create EOS Accounts for free in a simple way, please refer to our recent guide using Wombat Wallet or Dapp Accounts:
EOS Onboarding: Free Accounts
4. IMPORTING A PRIVATE KEY TO ANCHOR
If you have created your EOS account through our guide and you want to use the same account to access a DAPP on your computer, you should import the EOS account private key on to Anchor:
- Copy the private key you previously generated when you were creating your EOS account.
- Open Anchor
- Click on Tools > Security > Manage Keys > Import Key
- Insert your local Anchor password, or set one if you previously did not do so.
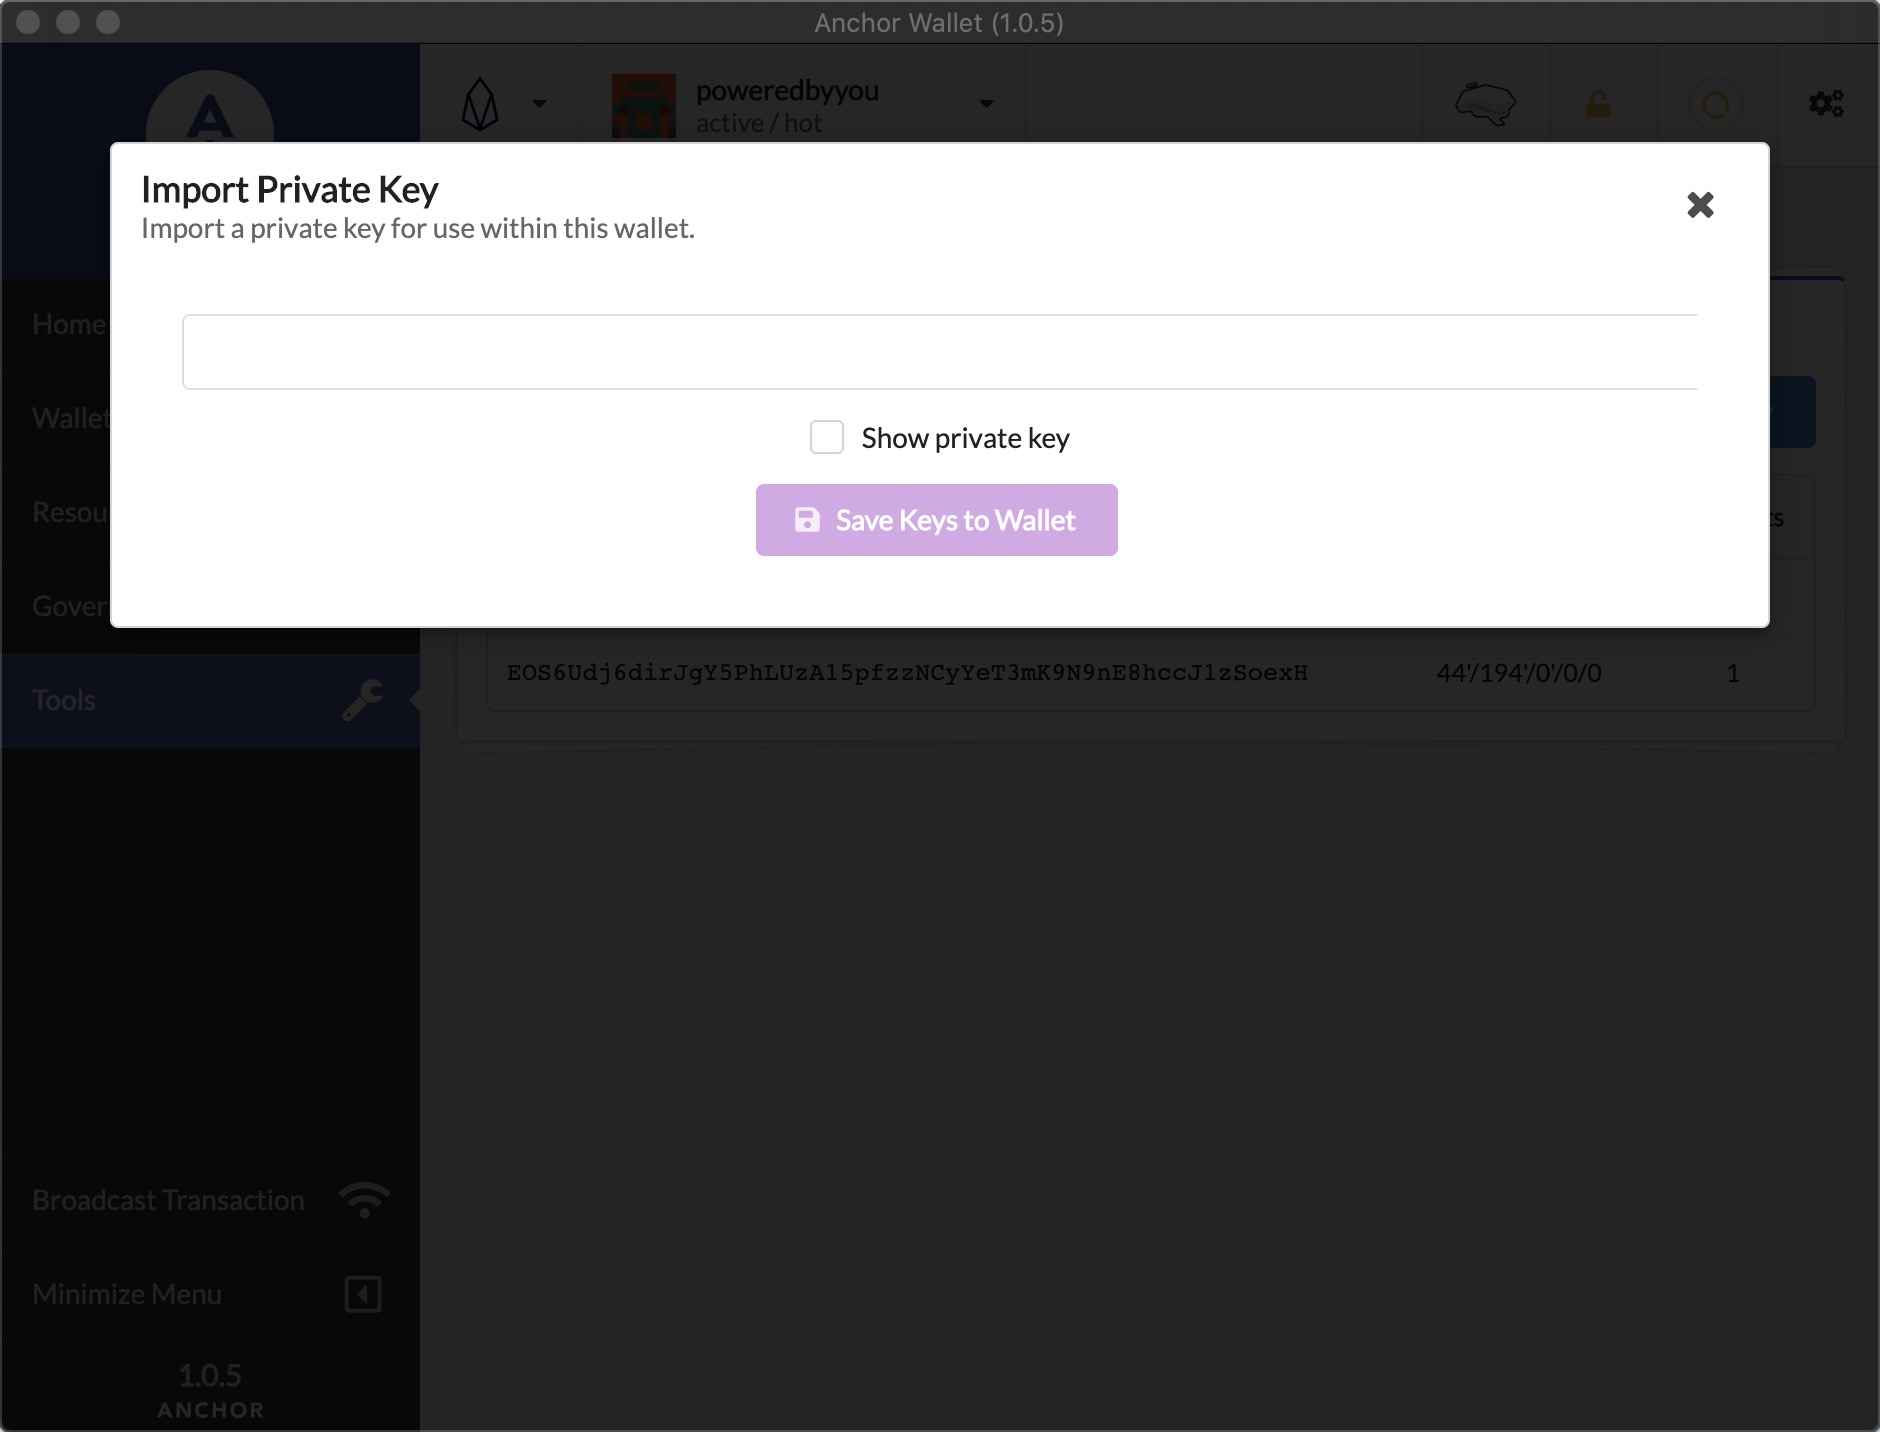
- Paste your private key on the correct field and click "Save Keys to Wallet"
- Anchor will now add your private key on the wallet manager
- To finally add your accounts on Anchor, click on "Manage Wallets" and select your new EOS Account.
Done! You can now use the EOS account you created on Anchor, allowing you to interact with DAPPS. You can look for dapps on DappRadar or on EOS Go. homepage.
5. WHAT ARE ACTIVE AND OWNER KEYS?
Active Keys:
- These are the keys that you should use for your daily operations. This private key tends to be used for tasks like transferring funds and voting. Active keys can’t be used to change the owner private keys. If the active key has been compromised, you can change it using your OWNER key.
Owner Keys:
- Owner key = ownership of an account. The owner key will allow you to do anything that the active keys do. But in addition to this, owner keys will allow you to change both the account’s owner and active keys. This is sort of like how some websites will require you to enter your old password before you update your account to have a new password.
Every EOS account has at least two types of permissions; owner permissions and active permissions. Each transaction needs to be verified and signed by one of these permissions to be considered valid. Transactions are signed by a wallet that stores key pairs associated to your accounts. This means wallets protect and make use of the keys that control your EOS accounts.
Source: https://www.eosx.io/guides
6. TYPES OF WALLETS
There are three types of wallets: hardware wallets, software wallets and paper wallets.
Hardware wallets are the safest means for storing your keys. You purchase a physical device which generates and holds your key information for you. This protects your keys even if you are using an untrustworthy computer. The Ledger Nano S is one of the most used Hardware wallets.
Software wallets are based on computer software. Your keys will be stored locally on your device, allowing you to control your keys from you computer, laptop, phone, etc. However, if your computer gets hacked you risk losing your keys, and consequently, your funds. Scatter and Greymass are two Desktop wallets, while Wombat and Anchor Mobile are two mobile wallets.
Paper wallets are a printed QR codes that contain your private key information. Paper wallets are considered one of the most secure options to store private keys as they are not connected to the internet and cannot be hacked. Another plus is that they are practically free as you can print them out on paper via a printer. However, it is still risky to import a private key into a compromised computer.
7. WHAT ARE RAM, CPU AND NET?
RAM is a resource that developers must purchase (with EOS tokens) to run applications on the EOS blockchain. RAM is used to store data in an in-memory database. DAPPs will use RAM to store state information so it is quickly available via their application. Users have 8kb of RAM from the snapshot and this will be all they need. If you are a DAPP or you are creating accounts, then you’ll need to purchase more RAM.
CPU and NET are two types of resources that your account needs to perform actions on the EOS blockchain. CPU is measured in µs (microseconds) and NET is measured in KB (kilobytes). By staking EOS tokens, you will increase your CPU and NET limits. If you’re using all of your allotted CPU or NET, then you won’t be able to perform any more actions and will need to wait until your usage levels come down.
Your usage levels will automatically decrease over time, returning to a minimum level after about three days. Therefore, staking is essentially a rate-limiting mechanism. That is, if you need to perform more actions in a short amount of time (e.g. if you’re running a DAPP that handles many transactions per second), you will need to stake much more EOS tokens. These tokens are not spent — they are only staked or “parked,” and you can unstake them any time.
From https://www.eosx.io/guides
After your create an account, it will have a limited amount of resources: 0.1 EOS staked on CPU, 0.1 EOS staked on NET, and 3kb of RAM circa. With this amount of resources, it will probably not be possible to make any transaction, therefore you need to stake some EOS.
8. WHAT DO “STAKE” AND “UNSTAKE” MEAN?
When you stake your EOS, you’re “parking” your tokens. Your tokens will not be accessible until you decide to unstake them. Staking is essential in EOS because it grants you account resources (CPU and NET) that are required to perform any actions on the blockchain. When you stake for bandwidth, you will be allowed to send more transactions within a period of time, as the size of transaction consumes bandwidth.
To use the network, an average user will only need to have 1 or 2 EOS staked. However, the amount of EOS staked is also your voting power. Only staked tokens contribute to voting power when you vote for Block Producers.
When you decide to have your EOS in “movable” form, you will have to go through the unstaking process. Once you unstake the tokens, you will have towait three days for those tokens to be transferred from your staked balance to your unstaked balance, at which point you can transfer them at will.
Source: EOS Canada
You can Stake EOS for CPU and NET with Anchor:
- Open Anchor and select your EOS account on the scroll down menu on top.
- Click on Resources.
- Under the CPU or NET section, click on "Stake"
- Select the amount of EOS you want to stake, and finally sign the transaction.

Stake Huge Amount of CPU by buying REX Resources
Lately, staking your EOS is not very convenient if you use the network assiduously, for example, using various dApps on a daily basis. This is why the Resource Exchange (REX) exists.
What is REX?
REX (Resource Exchange) is a resource market that can meet the demand, where the EOS token holders can lease out tokens in return for “rent”, and the Dapps can lease resources they need with less cost.
For EOS holders:Earn an income via put your spare EOS tokens in REX instead of just keep it on your EOS account.
For EOS Dapps:Lease as much resources as you need at a decent price instead of stake EOS for resources in 1:1 ratio.
Source: TokenPocket
Through REX you can pay a small amount of EOS to receive a much larger amount in CPU or NET for a whole month. Today (August 20, 2020), paying 1 EOS on REX guarantees you 7,500 EOS in CPU for 30 days.
Using REX on Anchor is just as simple as putting EOS in stake:
- Open Anchor and select your EOS account on the scroll down menu on top.
- Click on Resources.
- Under the CPU or NET section, click on "Ret"
- Select the amount of EOS you want to pay, and check how many EOS you will receive staked
- Finally sign the transaction
Your EOS in stake will arrive in your account in an instant, and you may continue to use your favorite dApps.
EOS Staking Security
Remember that when you stake your EOS it takes 3 days to unstake them, for this particular reason staking can be used for security purposes.
If your account should ever be compromised, you will have 3 days to change the key pair that controls your account!
TLDR: Stake most of your EOS, and only leave the amount of EOS liquid that you would be willing to “lose” in case a hack occurs. If you stake your EOS, but need to use your EOS (ex: you want to send them to another account, you want to use them to buy something, etc) you will have to unstake your EOS. Unstaking your EOS takes three days. After that you are free to send/use your EOS as you wish.
CONGRATULATIONS! You have completed our EOS BEGINNERS: Anatomy of an EOS Account. If you have any questions be sure to ask us in the comments, or join our Telegram community to get customer support: [https://t.me/EOSGo] (https://t.me/eosgo).
Now that you understand the nuts and bolts of an EOS account, consider reading our beginner’s guide, “EOS BEGINNERS: Account Security Best Practices”.
EOS GO is powered by YOU. Join the community and begin contributing to the movement by adding eos go to your name and joining the EOS GO telegram group.