EOS Studio Tutorial #1 — Set up the environment for EOSIO development

Article written by EOS Studio and broght to you by EOS GO
EOS Studio is a graphical IDE for EOSIO dApp development. By integrating various tools required for EOSIO in a unified application, EOS Studio provides a powerful and easy-to-use environment for dApp development. The key features include EOSIO-customized code editor, built-in builder and deployer, interactive contract inspector, EOSIO version manager, and many more. With EOS Studio, developers can complete the whole dev process from local development, to debugging on testnets (Kylin & Jungle), and finally to the deployment on the EOS mainnet.
EOS Studio is currently available on Mac OS and Linux. You can access to the latest installation package at https://download.eosstudio.io/mac, https://download.eosstudio.io/linux and http://download.eosstudio.io/win.
In this series of tutorials, we will walk through the main features of EOS Studio and introduce dApp development from the very beginnings. Skilled EOS developers can also learn how to use EOS Studio to save tedious work and speed up their development.
Prerequisite tools for EOSIO Development
Quick Note* EOS Studio is currently available on Mac OS and Linux and should be downloaded prior to getting started with the tutorial.
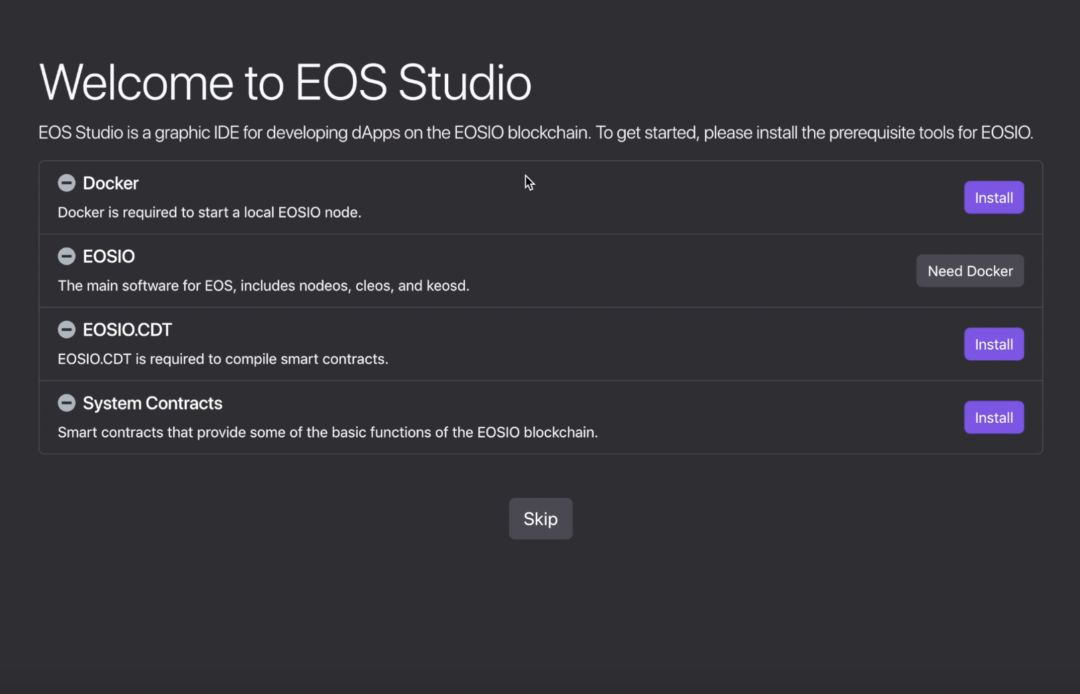
When you first open EOS Studio, a welcome page will help you install the prerequisite tools for EOSIO development, includes Docker, EOSIO main program, EOSIO.CDT, and system contracts. If you don’t need all the tools in your development, you can also skip some of the installations by clicking the Skip button.
Docker
Docker is used to install the EOSIO main program and run local EOSIO nodes. The Install button will forward you to the official website to download Docker. On Linux, EOS Studio will open the official documentation of how to install Docker on Linux.
After the installation, go back to EOS Studio and click the Start Docker button to start docker daemon. Once it is started an Install button will appear on the next line for EOSIO.
EOSIO
EOSIO is the main program, including the EOSIO node executable nodeos, the command line tool cleos, and the wallet management tool keosd. Click the Install button and select the version you want to install, EOS Studio will automatically download the EOSIO program (its docker image) for you through Docker.
Block.one will update EOSIO software regularly but note that different versions may be incompatible in some details, so EOS Studio supports having multiple versions of EOSIO installed simultaneously. If you need to develop across different versions, you can install more versions of EOSIO in the EOSIO Manager after the prerequisite installation is complete.
EOSIO.CDT
EOSIO.CDT (Contract Development Toolkit) is mainly used to compile smart contracts written in C++ to WASM. It is available as a Homebrew package so EOS Studio for Mac OS will automatically “brew�” it for you as long as you have homebrew installed. For the Linux users, since the installation is not as straightforward, EOS Studio will forward you to the EOSIO.CDT GitHub repo where you can find the installation instructions.
System Contracts
System contracts include the source code for many EOS official contracts, including eosio.token, eosio.msig, etc. They are not required but it’s good to have them as a reference. By clicking the Install button, EOS Studio will clone its repo.
Once all the tools have been successfully installed, there will be four green checkmarks on the left and a Get Started button will appear at the bottom. Click the button to enter EOS Studio and you are now ready to start EOSIO development.
In the next article, we will introduce the EOS Studio code editor and contract inspector. Through the system contract eosio.token, you can learn how to manage local EOSIO node, build & deploy smart contracts on the local node, and interact with contract actions and table data.
We value any thoughts you might have about EOS Studio as well as this series of tutorials. Please let us know your feedback and it will help us make EOS Studio better. More information is available at:
Website: https://www.eosstudio.io
Telegram: https://t.me/eosstudio
Disclaimer: The views expressed by the author above do not necessarily represent the views of EOS GO. EOS GO is a community where EOS GO Blog being a platform for authors to express their diverse ideas and perspectives. To learn more about EOS GO and EOS, please join us on our social medias.
EOS GO Telegram - EOS News Channel - Twitter