EOS Studio Tutorial #2 — EOSIO Development on Local Node

Article written by EOS Studio and broght to you by EOS GO
EOS Studio is a graphical IDE for EOSIO dApp development. By integrating various tools required for EOSIO in a unified application, EOS Studio provides a powerful and easy-to-use environment for dApp development. The key features include EOSIO-customized code editor, built-in builder and deployer, interactive contract inspector, EOSIO version manager, and many more. With EOS Studio, developers can complete the whole dev process from local development, to debugging on testnets (Kylin & Jungle), and finally to the deployment on the EOS mainnet.
EOS Studio is currently available on Mac OS and Linux. You can access to the latest installation package at https://download.eosstudio.io/mac, https://download.eosstudio.io/linux and http://download.eosstudio.io/win.
In this series of tutorials, we will walk through the main features of EOS Studio and introduce dApp development from the very beginnings. Skilled EOS developers can also learn how to use EOS Studio to save tedious work and speed up their development.
In Tutorial #1, we’ve finished the installation of prerequisite tools for EOSIO. We are ready to do the real work now, so in this article, we will use EOS Studio to go through the complete development process for an EOSIO smart contract, including:
- Create/open a project
- Build/compile a smart contract
- Start a local EOSIO node
- Create local accounts
- Deploy a smart contract
- Execute contract actions
We’ll hold off on covering how to actually do coding for a smart contract right now because I believe it’s better to understand the whole process of contract development first. Otherwise, you won’t be able to know how to execute the codes you just wrote, right? For those who are already familiar with writing EOSIO smart contracts, this article can also be a quick overview of EOS Studio’s main features. We will use the system contract eosio.token so you will have a chance to play with this non-trivial contract at the beginning. It seems like a good portion of people who get into contract development use this as a first contract to look at. Let’s begin!
Create/open a project
When you just enter EOS Studio after the prerequisite installation, you will see a screen for an empty project where you can either create a new project or open an existing project. Through EOS Studio it’s very convenient to bootstrap a new project. By simply entering the main contract name and selecting a folder for the project, EOS Studio will automatically generate the initial _cpp_and hpp files with some basic codes for a “hello world” smart contract. You can start from here to go on and build more sophisticated things.
The code editor has integrated some of the most practical tools for contract development. For example, it supports highlight and autocompletes for EOSIO-specific syntax. In the toolbar menu at the top left, there are some handy buttons that help you easily do common operations such as create new contract file, compile contract and deploy contract.
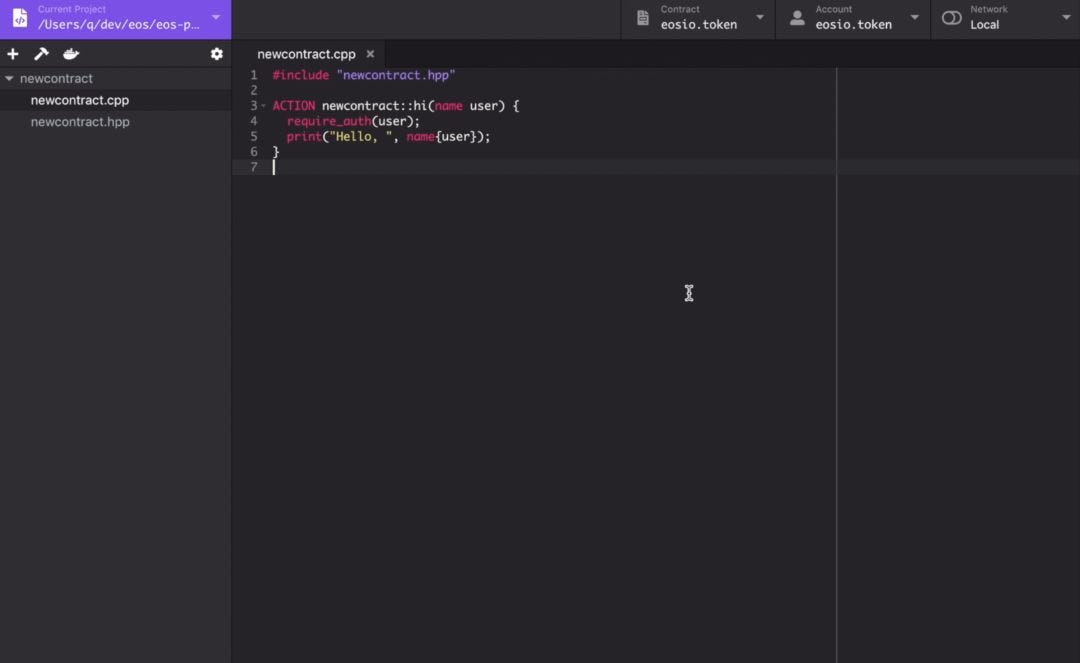
EOS Studio code editor
To make an EOSIO project more configurable, EOS Studio defined a .eosprojfile, similar to the package.json file for a node project, to describe project-wide parameters and settings. For projects created through EOS Studio, the .eosproj file will be generated using default settings. Otherwise, you need to specify some configs so that the compile and deploy buttons can work properly.
EOS Studio provides a Project Settings page to easily view and modify the .eosproj file, accessible by clicking the cog button in the toolbar menu. The first item defines the main file for the project and the compile process will start from this file. The second contract name item corresponds to the --contract attribute for CDT command line and is also required for compilation. The following items are optional and usually used for some advanced configuration in compilation. You can refer the CDT command line documentation to learn how to use them.
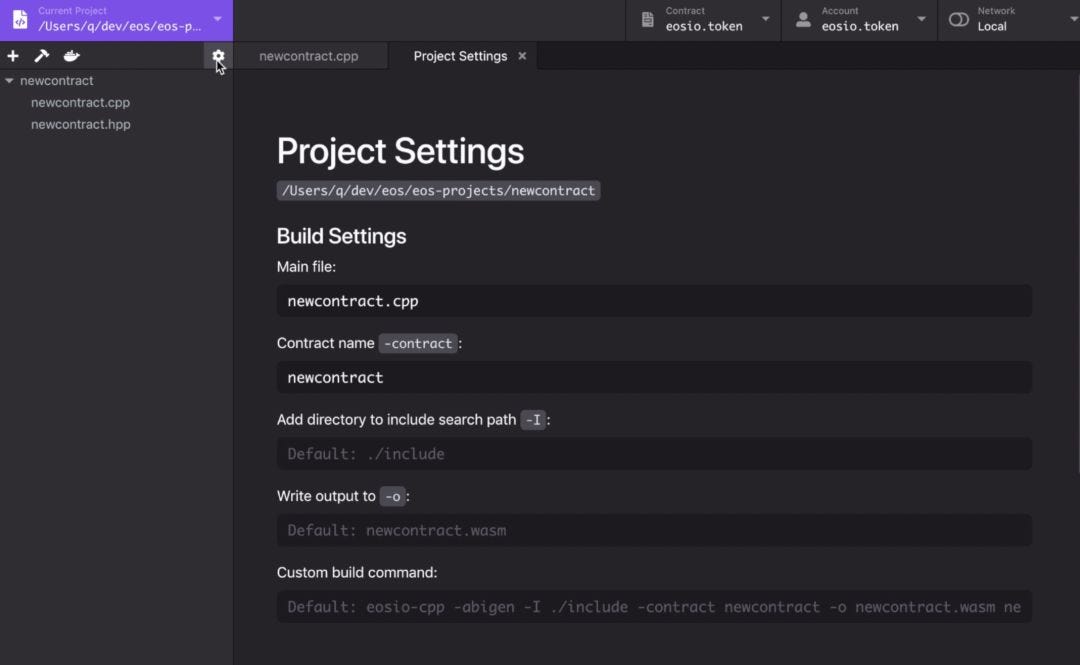
Project Settings
In the below Deployment Settings, you can specify the account to which you want to deploy your smart contract. EOS Studio supports local, Kylin and Jungle testnets, and EOSIO mainnet, so you can specify them separately. For example, if we enter newcontract in the local config line, you will see the name also appears next to the deploy button in the toolbar. Now if we click the button, EOS Studio will deploy the latest compiled codes to the newcontractaccount.
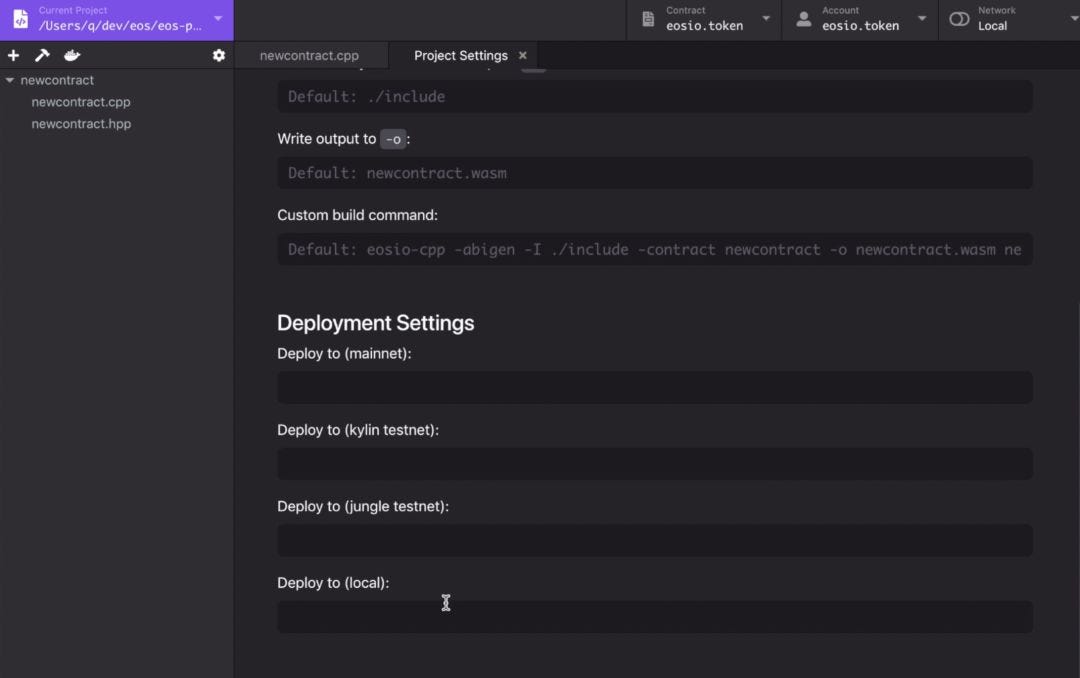
Project Settings — Deployment Settings
Build/compile a smart contract
The newly created project is compilable out-of-box. By clicking the _build_button, EOS Studio will call CDT for compilation and generate the wasm and abi files. These are actually the files to be used when deploying.
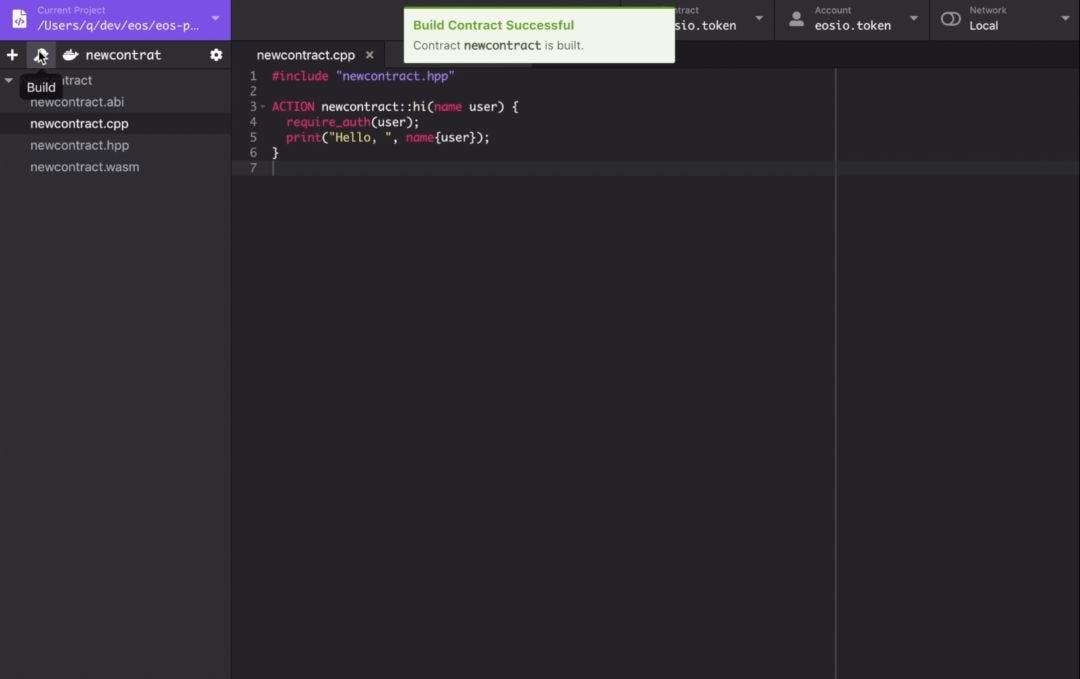
Building smart contract
The EOS Studio code editor has another convenient feature, that it will display the build errors just at the lines where the errors happen.
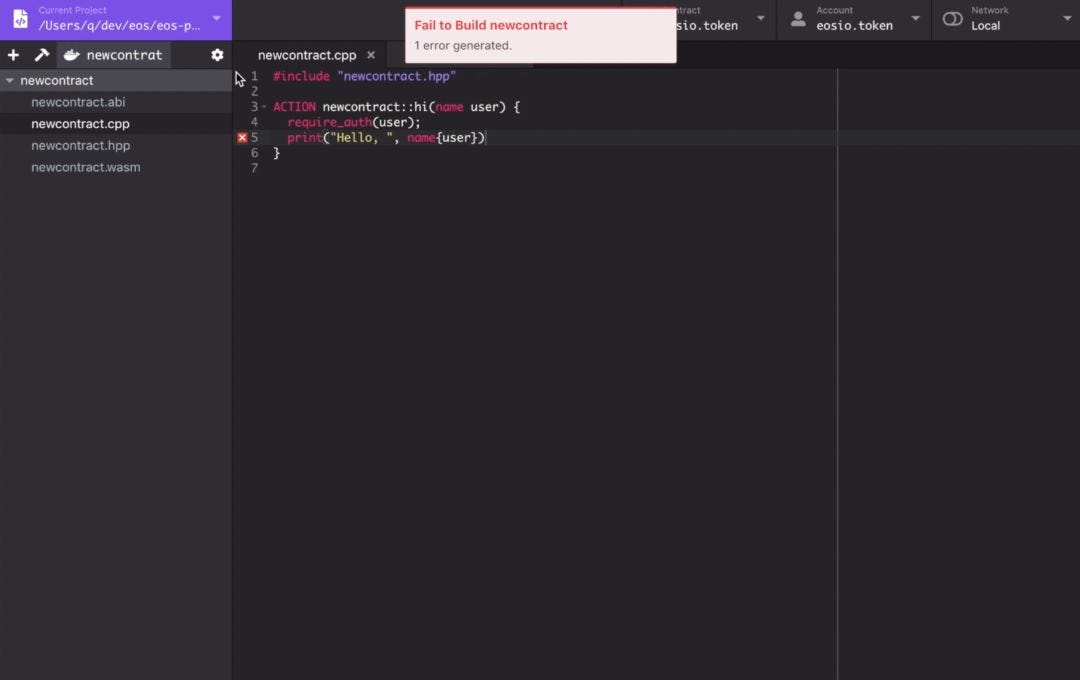
Build errors shown inline
Since we want to deploy and interact with a more complex and interesting contract later, let’s open the system contract eosio.token now and compile it. Go to “File -> System Projects -> eosio.token” to open it. Since this will be the first time to open this project in EOS Studio, we need to set up the project in Project Settings. Fill in src/eosio.token.cpp for main file, and eosio.tokenfor contract name. In Deployment Settings, also fill in eosio.token for _local_item. Now click the build button to compile this project, and wait until the wasm and abi files are generated.
Start a local EOSIO node
Before we deploy the contract, we also need to start a local node. Under the Network tab, you can see the EOSIO that was previously installed. To start a local node, just click the Start button. In the terminal below you will see the node is producing blocks right now.
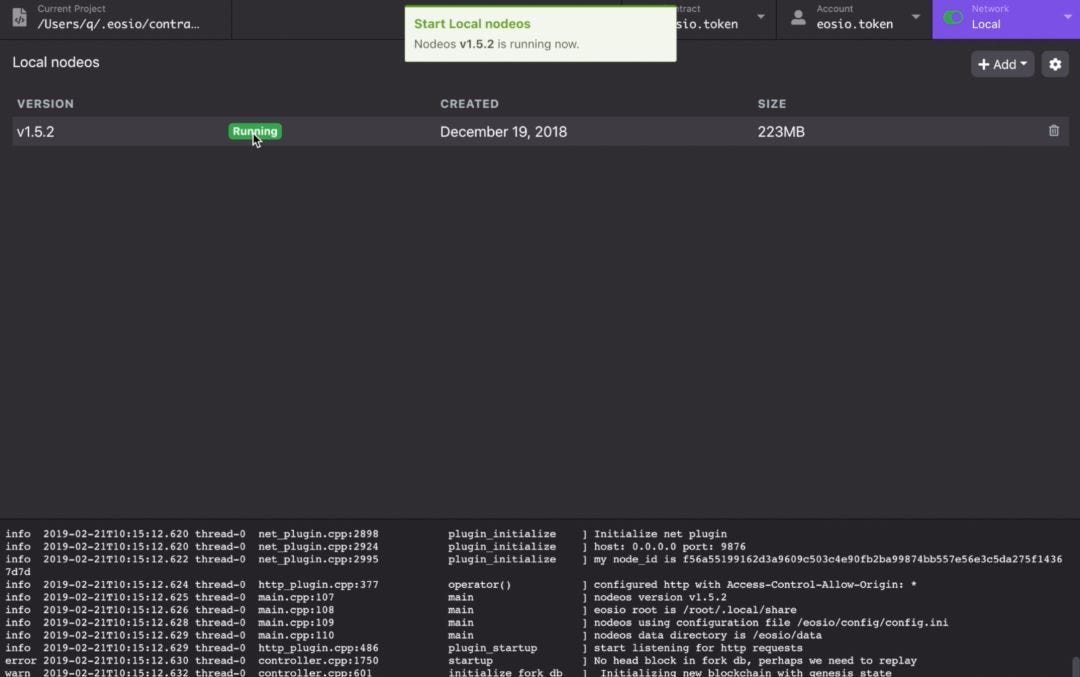
Starting a local EOSIO node
If you need to use a different version of EOSIO, you can download and install other versions by clicking the Add button in the upper right corner. You can also adjust some advanced configuration for nodeos and keosd by clicking the cog button.
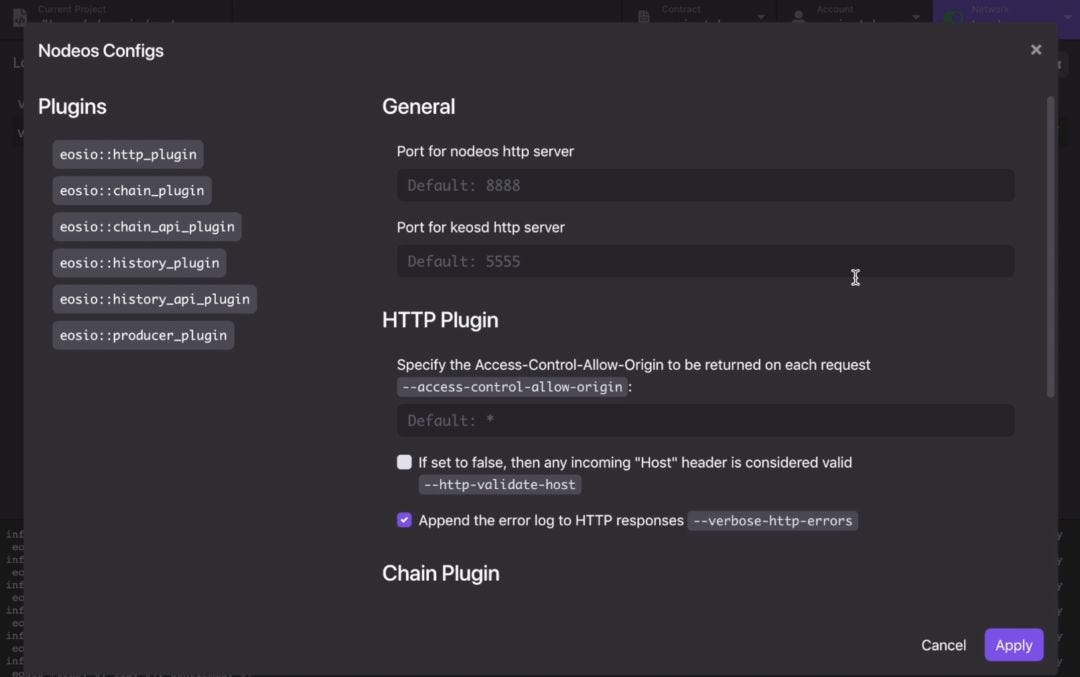
Advanced configuration for EOSIO
Create local accounts
We will also need to create the eosio.token account on the running node we just started. A public key is required to create an account. Go to Accounts -> Manage Keypairs to and copy a public key. If you need to use another public key, click the Import New Key button and enter the private key.
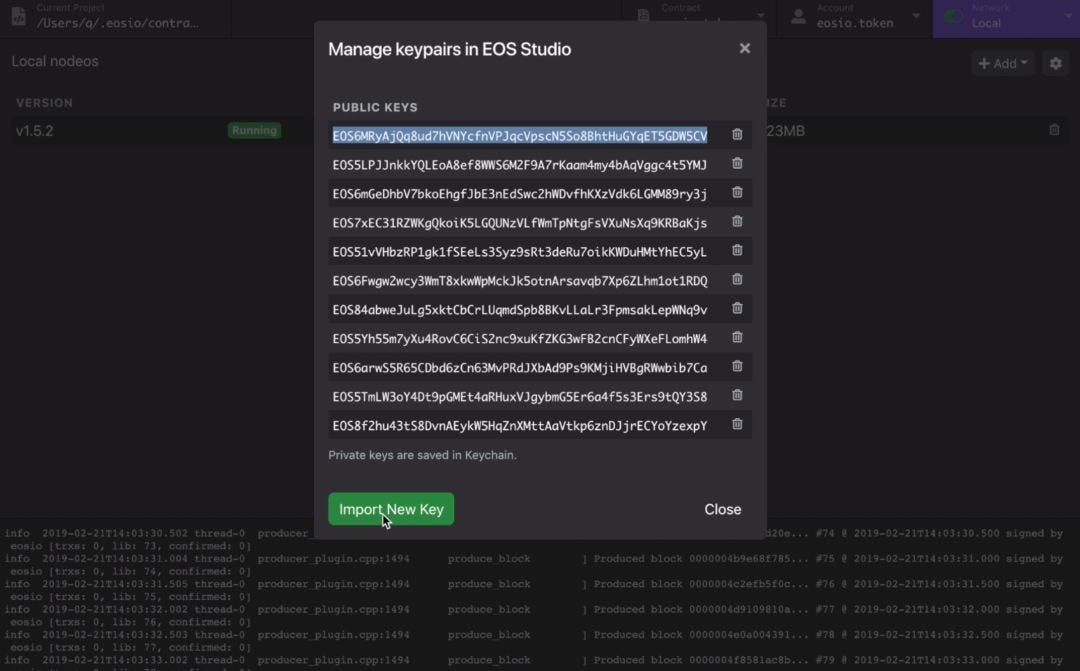
Keypair Manager
Then, go to _Accounts -> Create Account. E_nter the account name eosio.token, and paste the public key to create the account.
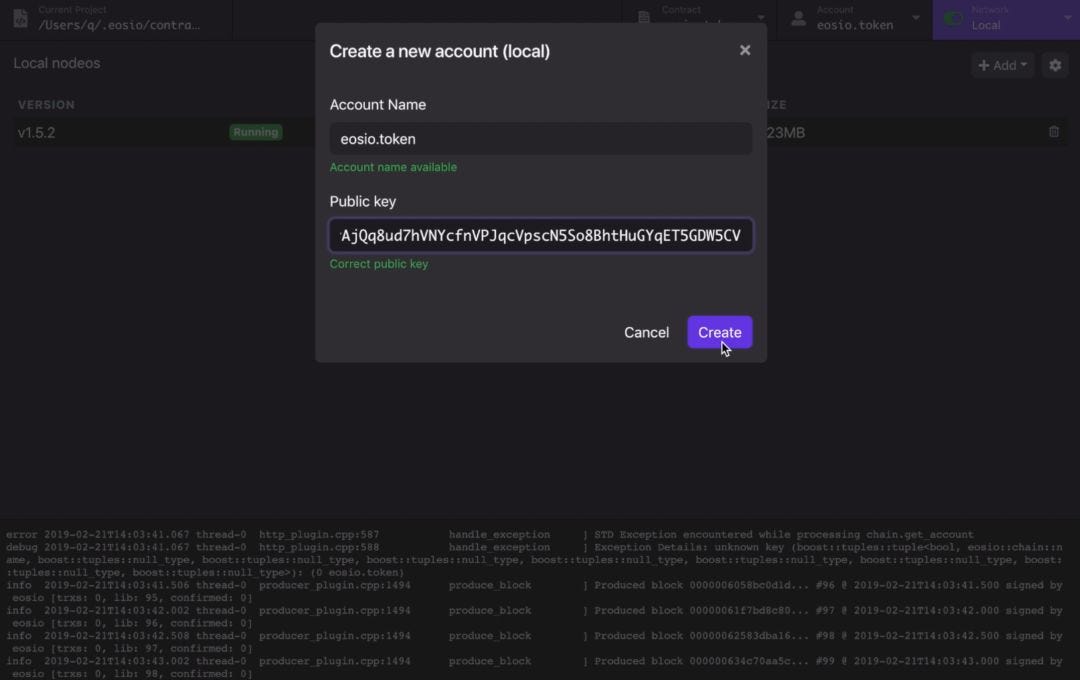
Create a new account
Now if you go to the Account tab, you can type in the account name and have a look at the account information.
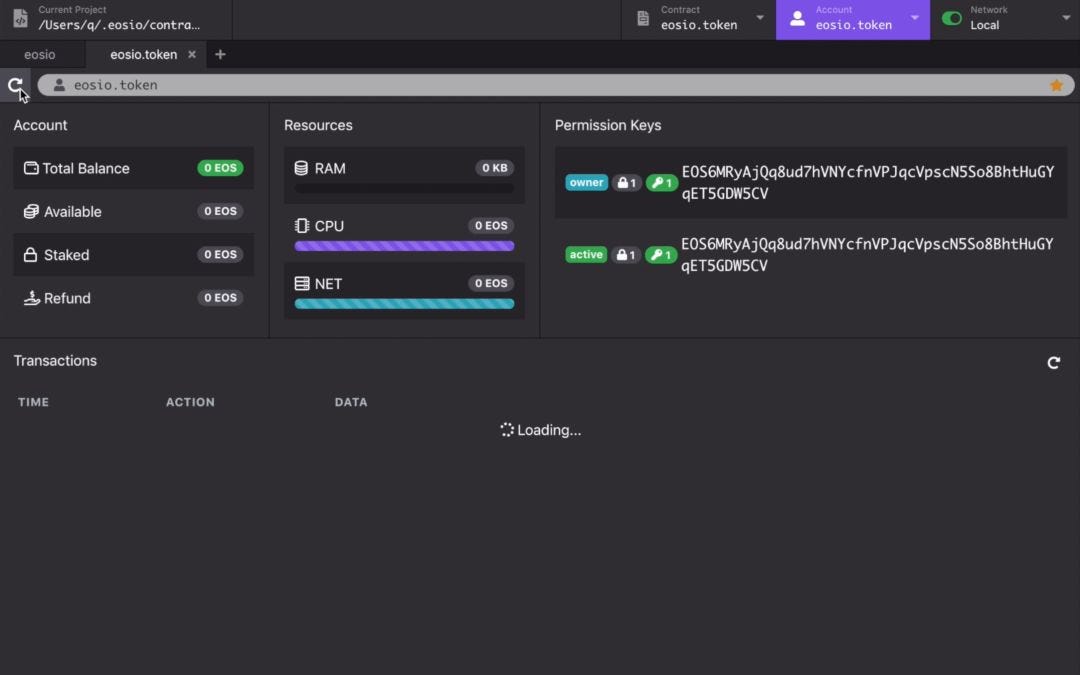
Account information
Deploy a smart contract
We are ready to deploy the contract now. Go back to the code editor and click the deploy button (you should see eosio.token next to the button). EOS Studio will finish the necessary operations for you, including calling setcode for _setabi_actions.
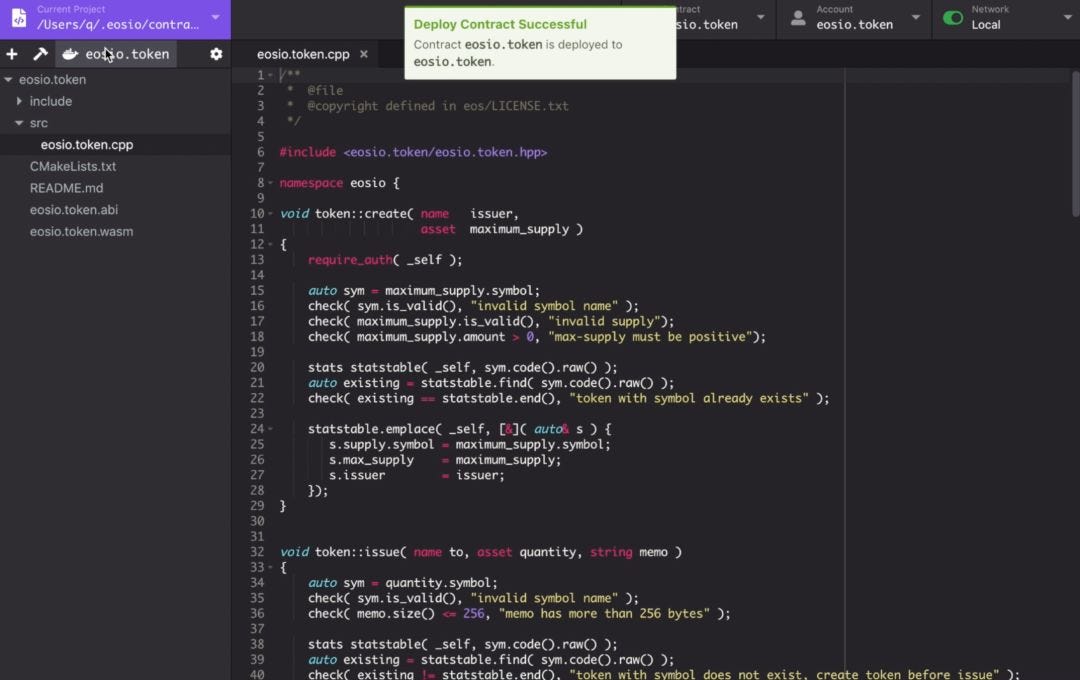
Deploying a smart contract
After the deployment is complete, go back to the account page, you will see the records for setcode and setabi in transactions, indicating that the deployment is on chain.
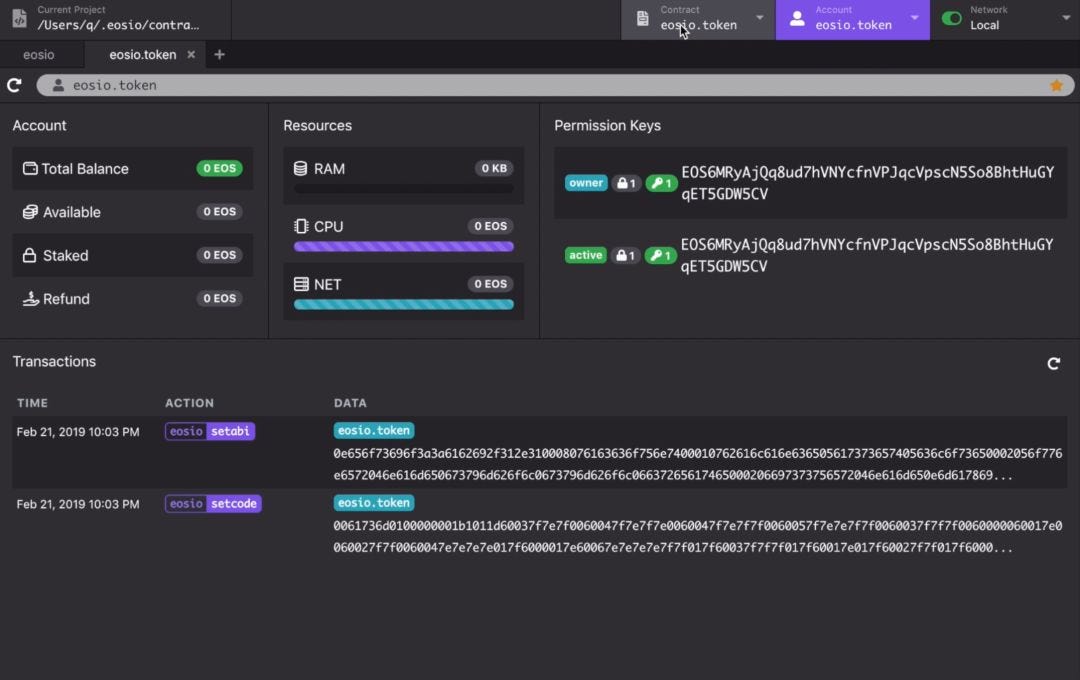
Account information after deployment
Execute contract actions
We are all ready to interact with the contract now! Open the Contract tab and type in eosio.token in the navigation bar to open the contract.
The EOS Studio contract inspector has two parts: 1) a panel to execute actions on the left, and 2) a panel to query table data on the right. In the dropdown menus at the top left for each panel, you can easily view all the actions and all the tables respectively.
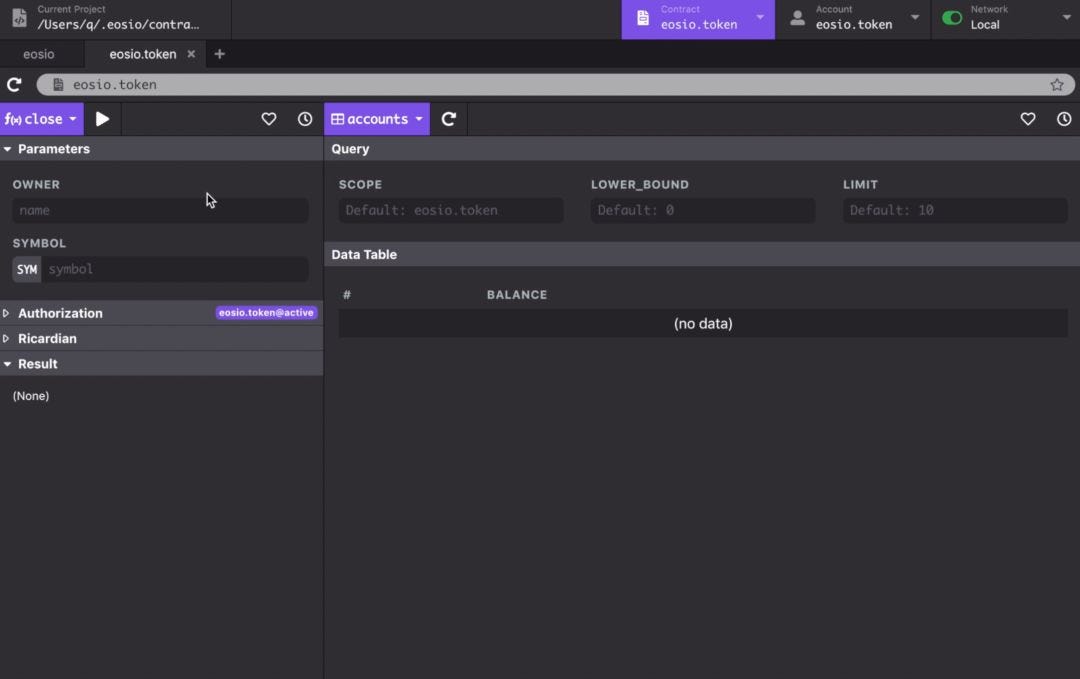
EOS Studio contract inspector
To start using the eosio.token contract, we need to first create a new token. Select the create action from the action dropdown menu. Set the issuer to be eosio, and the maximum supply to be 1000 EOS. Click the play button on the top to execute the action.
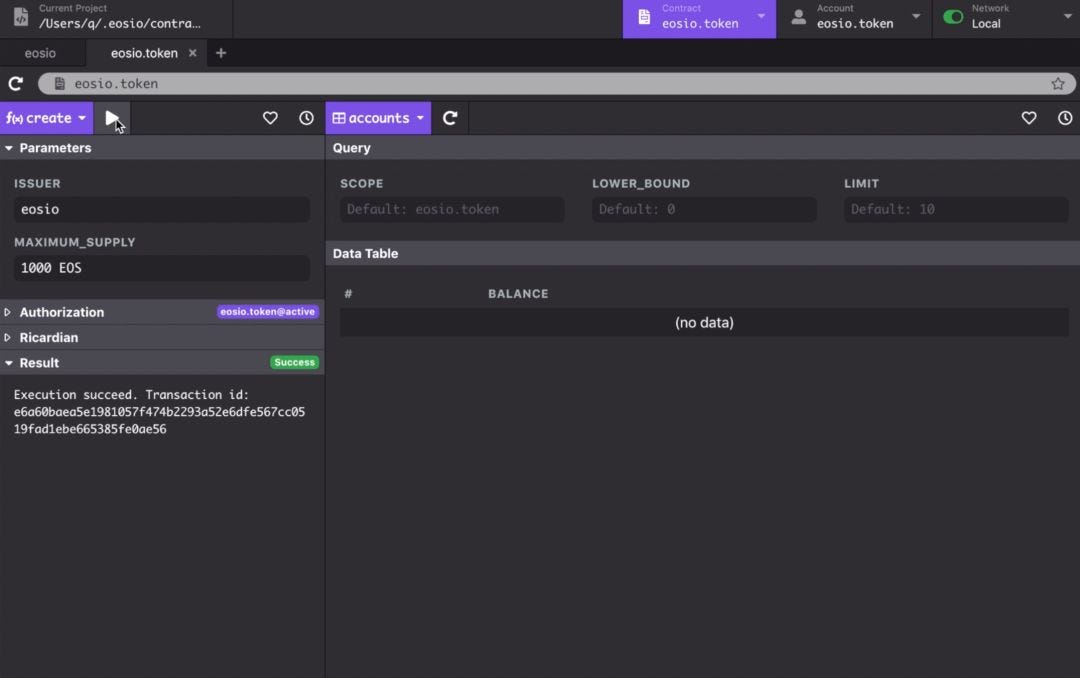
Execute an action to create a new token
Now, go to the right table panel and select stat from the dropdown, and enter EOS in the scope field. Click the r_efresh_ button and you will see the new EOS token of supply 1000 is created.
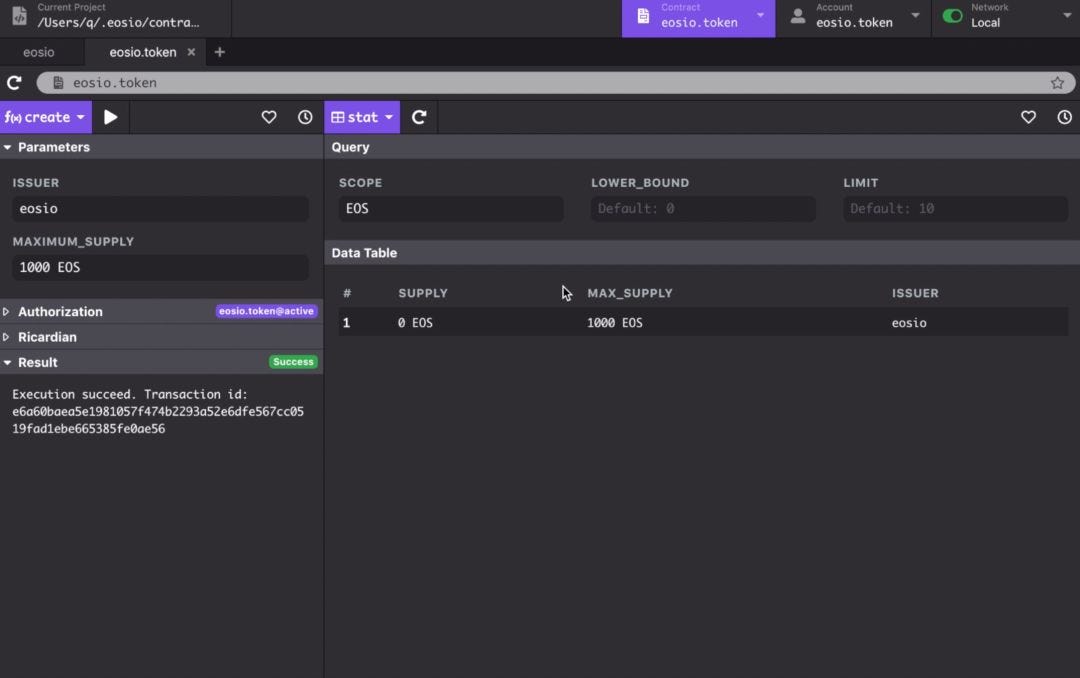
View table data for newly created token
We want to issue the newly created token to ourselves. To do this, Select the issue action and we decide to issue 10 EOS to eosio. When we execute the action this time, an error arises(which we intended for this example). You can see the details in the result window. The reason for this error is that the authorization account must be the same as the issuer we specified when creating the token.
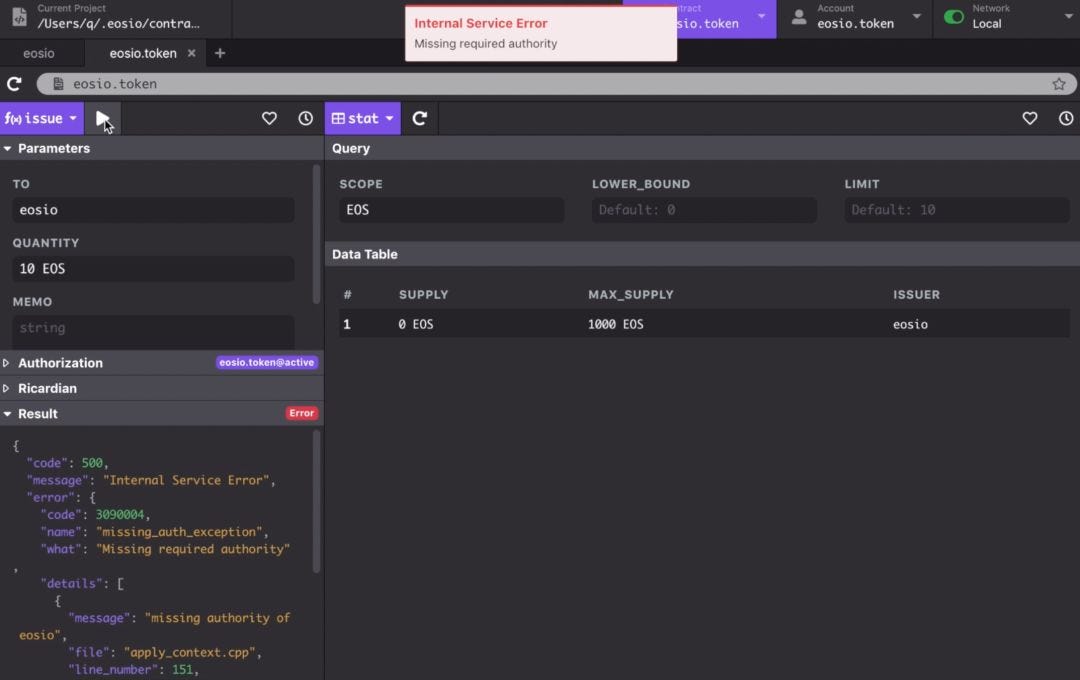
Error message in executing an action
EOS Studio supports changing the authorization account. Open the authorization window and type in eosio for the actor. Now re-run the action and you will see it executes successfully this time. If you refresh the stat table, you can also see the token has 10 EOS supplied (issued) already.
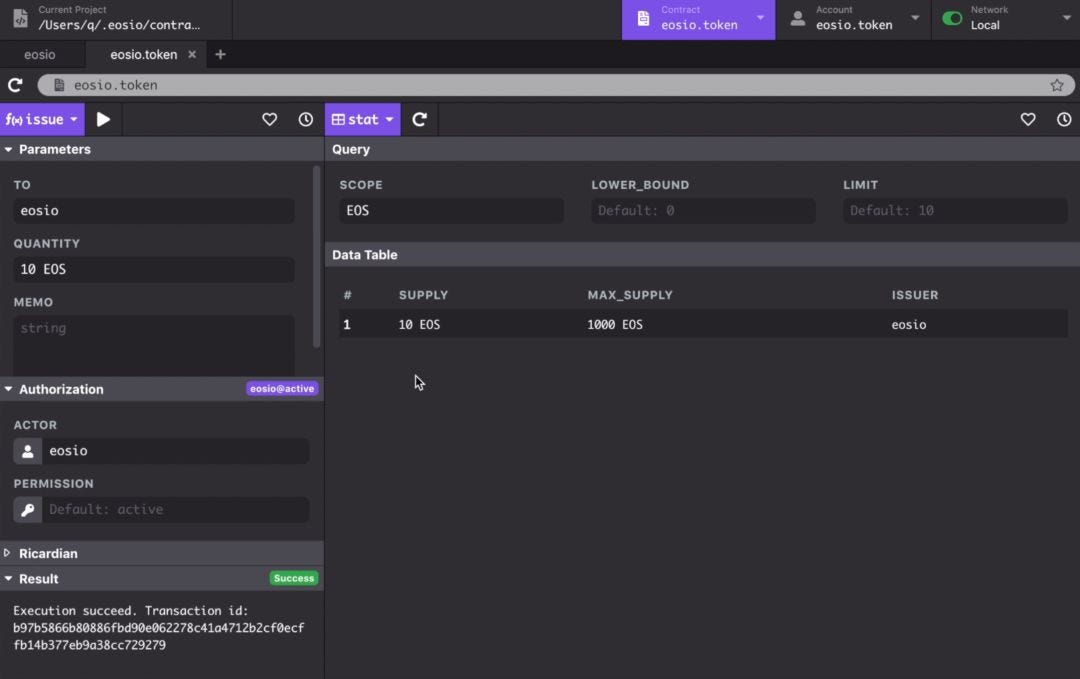
Change authorization
When we are debugging a smart contract, we often need to call the same actions repeatedly, and constantly refresh the table to view the most recent data. Most HTTP API clients will store call history and have bookmarks to save common-used parameters. EOS Studio has these features too. Within the clock icon buttons on the top right for each panel, you can see the histories for action executions and table queries. They would be convenient if you need to check past execution results, or simply want to re-run with the same previous parameters.
EOS Studio can also save frequently used parameters to bookmarks. For example, if I want to issue 10 EOS to myself repeatedly, I can save it so I don’t need to enter them again. Go to the heart icon and select add to bookmarks, you will see the contract action, the authorizer, and parameters to execution with. Just enter a name and save it, and you can access it in bookmarks anytime in the future.
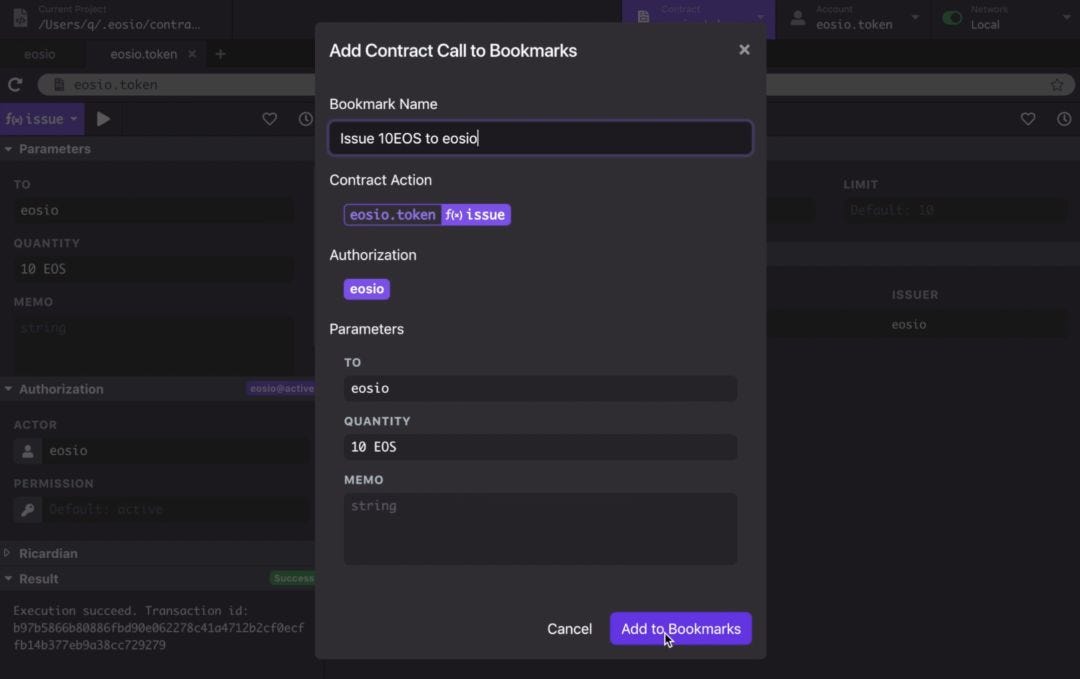
Add to bookmarks
Finally, if you want to check the actions being executed, go back to the account tab and refresh the transactions. In our case, you can see the _create_and issue actions with the parameters we used, indicating they were indeed executed successfully.
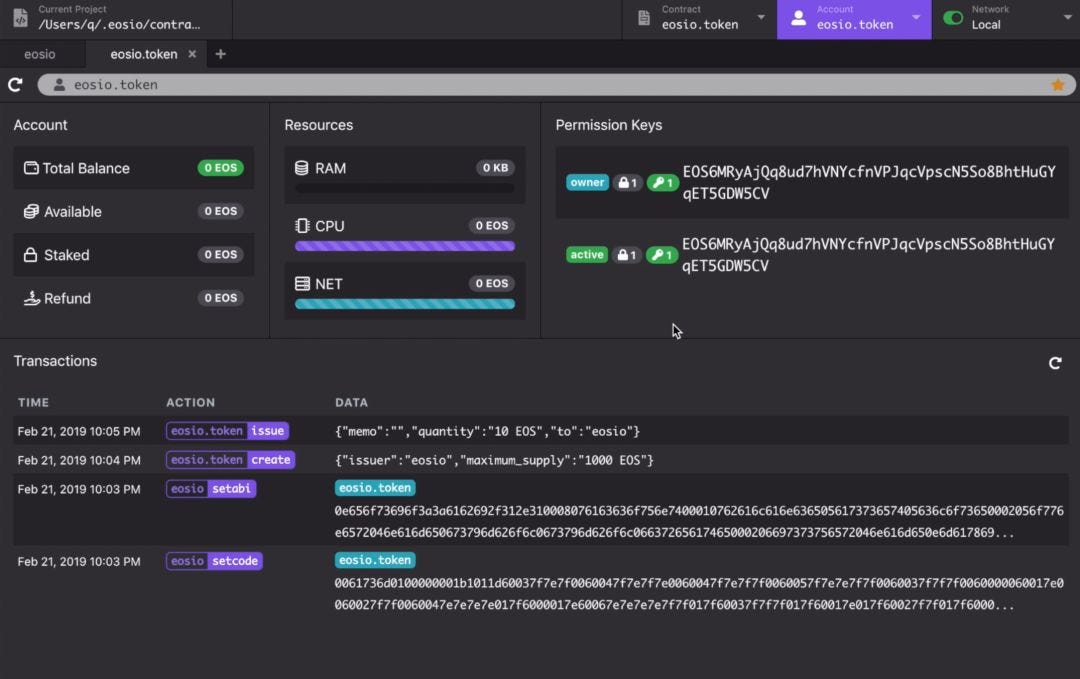
Account with some actions executed
We’ve just gone through the complete process for EOSIO contract development. This includes creating a project, compiling contract code, starting a local node, creating an account, deploying a contract to the local node, and invoking contract actions. We did these on a local node, but the process would be very similar on testnets and mainnet. For the next article, we will show how to develop on Kylin/Jungle testnets and EOS mainnet. EOS Studio provides some handy tools such as faucet and memory management to make the dev process more smooth. Stay tuned!
We value any thoughts you might have about EOS Studio as well as this series of tutorials. Please let us know your feedback and it will help us make EOS Studio better. More information is available at:
Website: https://www.eosstudio.io
Telegram: https://t.me/eosstudio
Disclaimer: The views expressed by the author above do not necessarily represent the views of EOS GO. EOS GO is a community where EOS GO Blog being a platform for authors to express their diverse ideas and perspectives. To learn more about EOS GO and EOS, please join us on our social medias.
EOS GO Telegram - EOS News Channel - Twitter